How to Ship a Print


i feel like this a good place to ask this
i am selling my keyes stampede and when i originally got it, it was rolled image out (like most glicee i get) but my question is when rolling it back up to go into a tube should i go the way i got it or the regular way of the image rolled up?
fwiw it has been stored pretty much flat since i got it
i am selling my keyes stampede and when i originally got it, it was rolled image out (like most glicee i get) but my question is when rolling it back up to go into a tube should i go the way i got it or the regular way of the image rolled up?
fwiw it has been stored pretty much flat since i got it

Unless the print would be perfectly flat now, I wouldn't roll against any sort of actual roll in the print.
It just screams wave in my mind.
It just screams wave in my mind.
Kramerica wrote:There are a ton of really nice people who come across as complete dickheads on EB.
-
electrachrome

- Site Admin
- Posts: 18199
- Joined: Tue Jun 22, 2004 12:00 am
- Location: Boston
I don't think it matters. the one thing I would recommend is using a sheet of glassine or tissue paper to cover the image.disdig1 wrote:i am selling my keyes stampede and when i originally got it, it was rolled image out (like most glicee i get) but my question is when rolling it back up to go into a tube should i go the way i got it or the regular way of the image rolled up?


Gammalyte use nothing but. Nice to pull a print that's been in it's tube for a week and have it open itself up almost flat. If it's gonna be in the tube for an extended period (i.e. overseas shipping), it helps.Codeblue wrote:5 inch wide tubes? That's silly and very expensive for most things. A 3" is fine for most jobs and keeps shipping cost lower. A lot of people use 4", but that's usually overkill and can greatly increase shipping costs.
UK Member? Reclaim some VAT... http://forum.expressobeans.com/viewtopi ... =8&t=85994
shut your mouth and open your mind
shut your mouth and open your mind

Disclaimer: I am just a random dude who has had a bit of experience with shipping and receiving prints in the mail. I am in no way responsible for any damage that may occur to your print should you use this guide. Use this guide at your own discretion.
Rookie mistake #1: Not leaving enough space between the print and the edge of the kraft paper.
Result: Bent corners, bumps, etc.
How to correct:
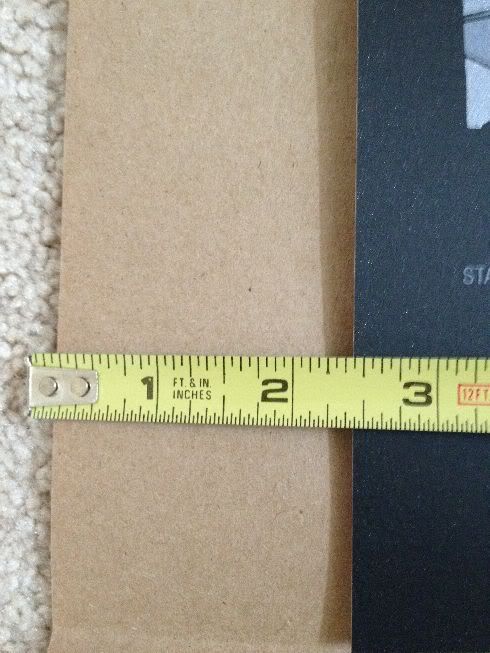
I recommend leaving at least two inches of space between the print and the edge of the kraft paper. Anything below 2 inches runs the risk of damage to the print.
Rookie mistake #2: Not padding the tube so that the kraft roll will not move around.
Result: Bent corners, bumps, etc.
How to correct:
Pad the tube either using my previous guide or by using plastic grocery bags.
Step 1: Start with one plastic bag. If it's a smaller tube, cut the plastic bag in half.
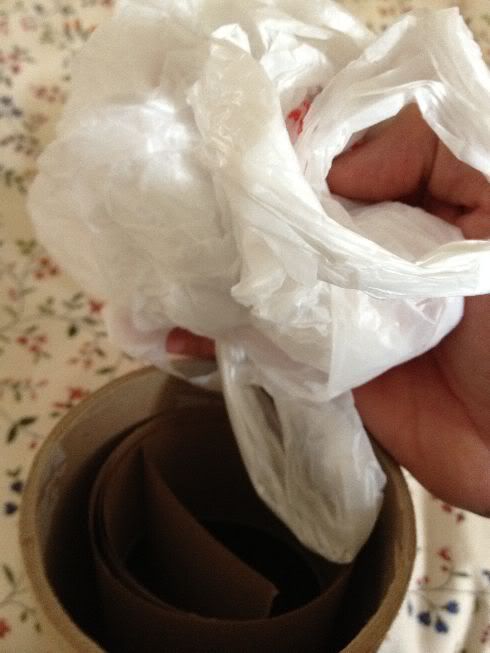
Step 2: Gently place the plastic bag on top of the kraft roll that is in the tube.
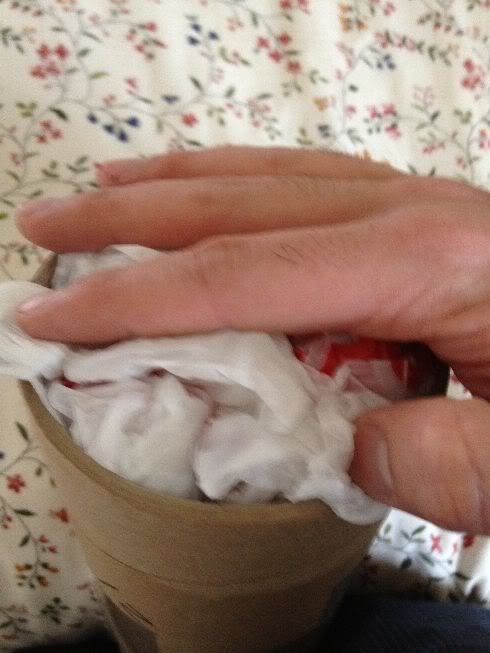
Step 3: Make sure the plastic bag overlaps the lip of the tube a little bit so that the plastic bag will stay in place when you place the cap down.

Step 4: Gently but firmly push down on the edge cap (for the first side). The kraft roll should push up a little bit on the other side.
Step 5: Repeat steps 1 through 3 on the other end. This time, since you are tightening the kraft roll down between the two plastic bags, be very careful. A little bit of resistance is okay since the kraft roll will be settling, but too much resistance means you have too much padding. Take out the bag and cut it in half and repeat if you get too much resistance.
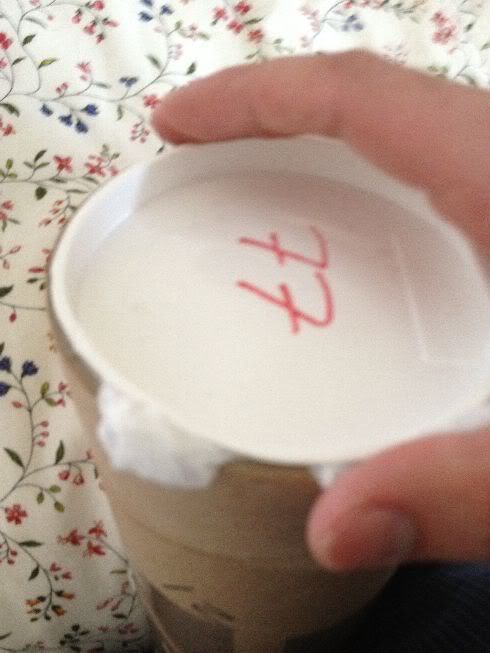
Step 6:
Remove the edge cap and inspect the kraft roll to make sure that the kraft roll is intact and not bent. If the kraft roll is bent up, it is possible that you are using a rather weak strength kraft paper or are using too much padding. As such, lighten the amount of padding or buy better kraft paper. Place the edge cap back on. I sometimes shake the tube around to make sure the kraft roll is not shifting around. If it is, I know to add more padding.
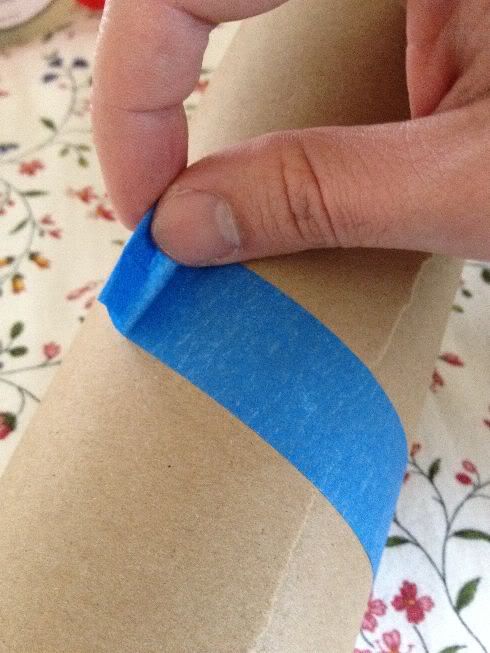
Rookie mistake #3: Making it impossible to remove the kraft roll tape.
Result: Possible damage to the print due to fingernails/loose tape/etc.
How to correct:
Use painter's tape and make a little tab. Make sure when the person pulls down on the tab, it's positioned so that the tape will come off cleanly and will not catch the edge of the kraft paper and tear (refer to the photo).
Rookie mistake #1: Not leaving enough space between the print and the edge of the kraft paper.
Result: Bent corners, bumps, etc.
How to correct:
I recommend leaving at least two inches of space between the print and the edge of the kraft paper. Anything below 2 inches runs the risk of damage to the print.
Rookie mistake #2: Not padding the tube so that the kraft roll will not move around.
Result: Bent corners, bumps, etc.
How to correct:
Pad the tube either using my previous guide or by using plastic grocery bags.
Step 1: Start with one plastic bag. If it's a smaller tube, cut the plastic bag in half.
Step 2: Gently place the plastic bag on top of the kraft roll that is in the tube.
Step 3: Make sure the plastic bag overlaps the lip of the tube a little bit so that the plastic bag will stay in place when you place the cap down.
Step 4: Gently but firmly push down on the edge cap (for the first side). The kraft roll should push up a little bit on the other side.
Step 5: Repeat steps 1 through 3 on the other end. This time, since you are tightening the kraft roll down between the two plastic bags, be very careful. A little bit of resistance is okay since the kraft roll will be settling, but too much resistance means you have too much padding. Take out the bag and cut it in half and repeat if you get too much resistance.
Step 6:
Remove the edge cap and inspect the kraft roll to make sure that the kraft roll is intact and not bent. If the kraft roll is bent up, it is possible that you are using a rather weak strength kraft paper or are using too much padding. As such, lighten the amount of padding or buy better kraft paper. Place the edge cap back on. I sometimes shake the tube around to make sure the kraft roll is not shifting around. If it is, I know to add more padding.
Rookie mistake #3: Making it impossible to remove the kraft roll tape.
Result: Possible damage to the print due to fingernails/loose tape/etc.
How to correct:
Use painter's tape and make a little tab. Make sure when the person pulls down on the tab, it's positioned so that the tape will come off cleanly and will not catch the edge of the kraft paper and tear (refer to the photo).
pewter14 wrote:You're not the only one on the hunt for The Thing ... just ... the most obvious ... by a lot.
pewter14 wrote:You're not the only one on the hunt for The Thing ... just ... the most obvious ... by a lot.


I cut the craft paper to fit the tube not the poster. I cut it about an inch shorter than the tube and tape the roll. It can move around to breathe but not enough to cause dents and so on. Plus, cutting the craft paper to fit the tube always gives you at least that 2 inch buffer. I don't think I've ever shipped a 24x36 print but I could see this cutting it short depending on the tube. I don't like adding anything else to the tube like grocery bags or bubble wrap. Maybe confetti, but only if the tube is pressurized.
Yeah, that's just how I do it. But if your way is better, feel free to document it in this thread.chimpun wrote:I cut the craft paper to fit the tube not the poster. I cut it about an inch shorter than the tube and tape the roll. It can move around to breathe but not enough to cause dents and so on. Plus, cutting the craft paper to fit the tube always gives you at least that 2 inch buffer. I don't think I've ever shipped a 24x36 print but I could see this cutting it short depending on the tube. I don't like adding anything else to the tube like grocery bags or bubble wrap. Maybe confetti, but only if the tube is pressurized.
pewter14 wrote:You're not the only one on the hunt for The Thing ... just ... the most obvious ... by a lot.
I had a tube a few weeks back which had been buffered with toilet paper. They stuffed it all down the middle of the rolled print too. Not sure what that achieved, other than to cause me to gag while picking it out. Turned out to be clean, but the suspense was crippling.Codeblue wrote:I don't like this bag nonsense. Taping bubble wrap to the tube is better.
Bubble wrap is the only way forward. Not only does it look professional, it's designed for the job. When you've thrown a big lump of cash at a print, you want it to look like someone has put care and respect into packaging it for you.
UK Member? Reclaim some VAT... http://forum.expressobeans.com/viewtopi ... =8&t=85994
shut your mouth and open your mind
shut your mouth and open your mind

Using painters tape and putting a tab on the end are 2 really good suggestions. It takes just a few seconds to add that tab and makes it so much easier for the person on the other end to unpack. Not only does it help prevent potentially damaging the print when you unpack, it also helps preserve the packing materials so they can be used again. Museum preparators and professional art movers typically do just that. Great advise CrustaR.